| Last Content Edit: Last Stats Update: |
Natural Selection is a multiplayer action/strategy game that requires Half-Life to play (see "Getting Started", below). In it, players join one of two very different teams:
The Frontiersmen--elite marines using advanced technology and weaponry to take back human ships and bases. Victory requires intense teamwork and excellent tactics.
The Kharaa--alien creatures with powerful evolutionary and biological abilities, who hunt and destroy all intruders to their new territory. Victory requires skillful adaptation and deadly combat proficiency.
Natural Selection requirements:
There are two game modes for Natural Selection--Combat and NS. Combat game mode sections in the Guide will be marked with a "(CO)". NS sections in this guide will be marked with an "(NS)". If a section is not marked, its information applies to both game modes.
![]() Combat is a fast and furious alternate gameplay mode, where waves of marines and aliens fight each other in short, intense games. It forgoes the strategy elements (most notably the Commander, resources, and tech tree) of the NS game mode. Players are rewarded for kills by gaining access to better weapons and equipment (marines), or abilities and lifeforms (aliens). The marines win by killing the alien hive; the aliens win by killing the marine command console.
Combat is a fast and furious alternate gameplay mode, where waves of marines and aliens fight each other in short, intense games. It forgoes the strategy elements (most notably the Commander, resources, and tech tree) of the NS game mode. Players are rewarded for kills by gaining access to better weapons and equipment (marines), or abilities and lifeforms (aliens). The marines win by killing the alien hive; the aliens win by killing the marine command console.
This gameplay mode is well suited for small numbers of players, and players who are unfamiliar with the (more complex) NS game mode. If you're a new player, give Combat a try first.
You can find servers running the Combat mode by looking for maps with the "co" prefix. Example: co_core, co_faceoff, etc.
![]() The NS game mode combines first person action with unique strategy elements. The Frontiersmen must work with their commander and each other to secure resources and defeat the enemy--the commander provides them with equipment and researches new technology on the tech tree. The Kharaa must secure resources to build new hives, which increase their power and abilities, all while hunting Frontiersmen. To achieve victory, each team must destroy their enemy's ability to respawn. There is no time limit on NS games. This mode is well suited for medium-to-large numbers of players.
The NS game mode combines first person action with unique strategy elements. The Frontiersmen must work with their commander and each other to secure resources and defeat the enemy--the commander provides them with equipment and researches new technology on the tech tree. The Kharaa must secure resources to build new hives, which increase their power and abilities, all while hunting Frontiersmen. To achieve victory, each team must destroy their enemy's ability to respawn. There is no time limit on NS games. This mode is well suited for medium-to-large numbers of players.
Servers running the NS mode will be using maps with the "ns" prefix. Example: ns_eclipse, ns_nothing, etc.
The Frontiersmen commander (NS game mode only) uses waypoints to gather troops together, help them get around the map, and send lone marines or entire squads to important objectives. Waypoints appear on your HUD like this:
Waypoints give their distance, the name of their location (note: some map locations don't have names) and any orders associated with it. Waypoints also appear on your minimap.
If you're lost, or your Commander asks you to go somewhere you're unfamiliar with, try asking for a waypoint.
Where the marines have a commander (NS game mode) and upgrades like motion tracking, the Kharaa have hive sight. When playing a Kharaa, try turning slowly in a 360� circle. You'll see ghostly rings, of different colors and sizes, many with descriptive text beneath them. Some will be your fellow Kharaa, on the other side of the wall, or the other side of the map. Others may be hives. You'll be able to see these rings move, and they will get larger or smaller with distance. The color code for hive sight is as follows:
| Hive Sight Icons | |
|---|---|
 |
Friendly hive |
 |
Friendly gorge |
 |
Friendly player |
 |
Friendly player under attack |
 |
Parasited enemy player or structure |
 |
Player detected by scent of fear |
In either game mode, activate your pop-up menu by holding your right mouse button (default setting). Releasing the button over an icon chooses that option. You can bind all commands on the pop-up menu to keys in the control menu. The pop-up menus for both game modes look a little different:
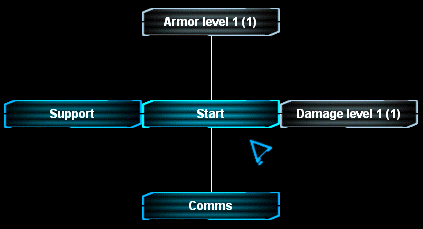
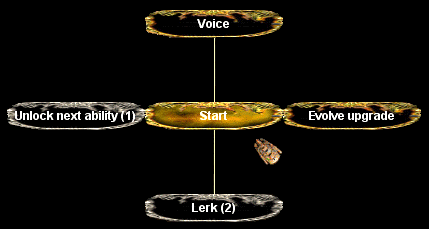
In Combat game mode, the pop-up menu is where you can increase your level and purchase upgrades. It also allows quick communication with your teammates.
| Marine Menu (CO) |
|---|
| Alien Menu (CO) |
|---|
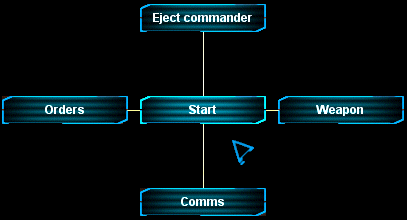
In NS mode, the marines use the pop-up menu for quick and efficient communication between squads and their commander--asking for orders, urgent equipment requests, or reporting combat conditions. When you use the pop-up menu for these purposes, the message (like "need health!" or "enemy spotted!") appears on the commander's interface, with an icon at your location. He knows who it's from, and exactly where you are.
| Marine Menu (NS) |
|---|
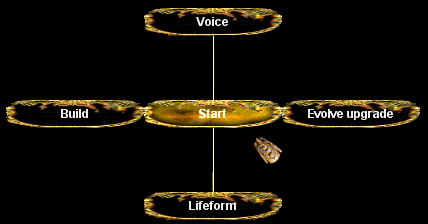
The Kharaa also use their pop-up menu to communicate with teammates (see "Hive Sight"); but it's mainly used to spend resources--to build, evolve new abilities, and change species (see the Kharaa sections below for more info.).
| Alien Menu (NS) |
|---|
The minimap shows the entire game map, from above. For marines, it is always displayed in the upper right hand corner of the HUD. Both aliens and marines can activate the larger version by pressing the "C" or "M" key (default). The minimap is invaluable for keeping track of your teammates, and navigating around an unfamiliar map. You can also use the minimap to see where your team is building, where your marine waypoint is, and more. The minimap is not available in Combat mode.
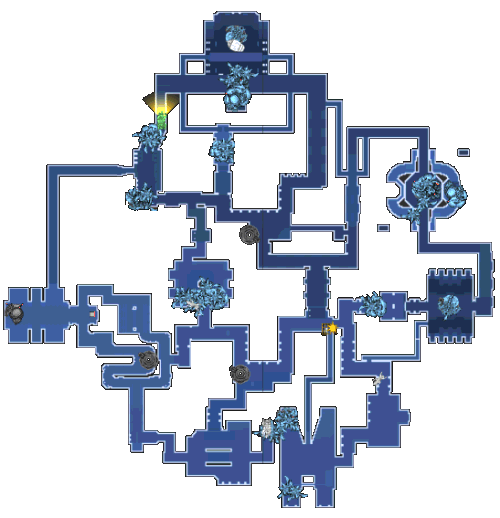
Here is the color code for the minimap:
You: green, with a yellow cone indicating direction.
Marine in Your Squad: green (w/no yellow cone).
Allies: gray.
Allied Structures: blue.
Enemies: red.
Enemy Structures: red.
Neutral Structures: gray.
Potential hive and resource node locations: gray*
Weldable Points: Spark and grate icon (yellow and gray)
* You can only see an enemy structure on the minimap if an ally can (see the "Siege Cannon" entry for parallels). You can always see your team's structures.
Respawning ("spawning" back into the game after dying) works differently depending on whether you're playing in Combat or NS game mode.
Marines and aliens spawn at the same rate in Combat, according to how many players are on their team, and their rank.
In NS mode, marines need an infantry portal to spawn. Each infantry portal will spawn a player every
Aliens need a hive to spawn. Each hive will spawn a player every
In Combat mode you get experience for kills, and you spend it to improve yourself. There are no team points, or resources to gather.
You get experience for killing the enemy, or attacking their base. As your experience increases, you gain levels � which can be spent on upgrades (see the next section), and determine your rank. Your rank reflects your overall experience score. You can see the rank of everyone on both teams by hitting the TAB key (default). Your current experience is also drawn at the bottom of the your HUD, along with your current level and rank.
This table shows the amount of experience required to gain new levels, along with rank names:
| Combat Experience Ranks | |||
|---|---|---|---|
| LEVEL NUMBER | EXPERIENCE REQUIRED | MARINE NAME | ALIEN NAME |
| 1 | -- | Private | Hatchling |
| 2 | Private First Class | Xenoform | |
| 3 | Corporal | Minion | |
| 4 | Sergeant | Ambusher | |
| 5 | Lieutenant | Attacker | |
| 6 | Captain | Rampager | |
| 7 | Commander | Slaughterer | |
| 8 | Major | Eliminator | |
| 9 | Field Marshal | Nightmare | |
| 10 | General | Behemoth | |
The tougher the opponent, the more experience they are worth--as shown here:
| Experience per kill | ||||
|---|---|---|---|---|
| ENEMY'S LEVEL | POINTS GAINED | ENEMY'S LEVEL | POINTS GAINED | Level 1 | Level 6 |
| Level 2 | Level 7 | |||
| Level 3 | Level 8 | |||
| Level 4 | Level 9 | |||
| Level 5 | Level 10 | |||
Extra cumulative experience is awarded when friendly players are nearby. For each friend that's nearby when a kill is made, the experience awarded is increased by
(
Another way to look at it: a group of five players making five level 1 kills (one per person), would have
Besides killing enemy players, there is one other way to get experience: attacking objectives. As a player inflicts damage on the enemy hive or command station, that player gains experience. This experience is not shared with nearby players.
In Combat mode, every time you gain a level you can purchase a new upgrade. As your rank increases (see above), you'll have access to more and more powerful upgrades. Unlike NS game mode, upgrades are permanent -- they are not lost when you die and respawn. Levels can be spent at any time, and unspent levels are also not lost when dying and respawning.
Upgrades are purchased using the Pop-Up Menu (see above). The following are the upgrade paths for marines and aliens:
| Marine Upgrades |
|---|
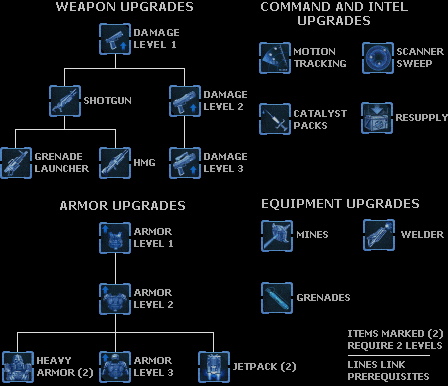
For descriptions, see the "Marine Technology & Upgrades" section, below.
| Alien Upgrades |
|---|
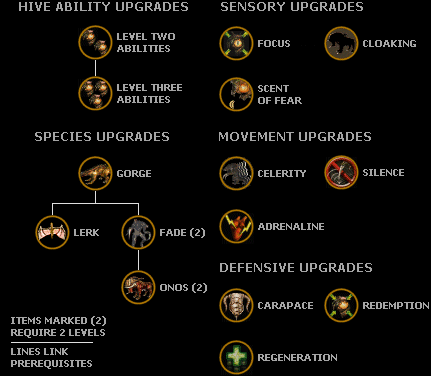
Notes on alien upgrades:
Change Species -- you begin play as a skulk, and can choose to change into four different and unique species. See "Alien Species" for descriptions.
Unlock Hive Ability -- there are four levels of abilities: Hive 0, Hive 1, Hive 2, and Hive 3. In Combat mode, you always have Hive 0 and Hive 1 abilities. The upgrade gives you access to Hive 2, and Hive 3 abilities, regardless of your species. See "Alien abilities" for more info.
Evolve Ability -- gain enough experience, and you can evolve all these abilities. See "Alien Evolutions."
In NS game mode, marines and aliens need team points -- called resources -- to build anything, or upgrade their capabilities. This makes securing and protecting resources the key to victory in all but the quickest of games. As explained below, the marines and aliens manage and spend resources very differently.
There are two methods of acquiring resources: killing enemy players and building on top of resource nodes.
| Natural Selection Resource Inputs | |||
|---|---|---|---|
| GAME ACTION | MARINE REWARD | ALIEN REWARD | |
| Killing an enemy player | |||
| Resource tower | |||
At the heart of the marine deployment is the commander. His role, and perspective, is different from all other players. From inside the command console he has a bird's eye view of the action -- deciding what to build and where to place it; equipping and healing your team; and guiding the marines to victory. The commander controls team resources, and chooses a path through the tech tree (see below). Every weapon and health pack he drops, costs. Keep the resources flowing to him, and you'll see the rewards.
Any marine can become commander by stepping into the command console. There can only be one commander at a time. See the "Commander Interface" section below for more information.
Note: The Frontiersmen are at their best working together to carry out the commander's orders (see also: "Waypoints"). Following orders doesn't just lead to victory -- it usually puts you where the action is, in the spots where the game is won or lost. A team without a commander, or that doesn't work very closely with one, is toast.
Resources are evenly distributed, automatically, among all Kharaa. Individuals can save them up and use them to build (as a gorge), purchase evolutions, or change their species (see sections below for more details).
While the Kharaa do not have a commander, the hive and the gorge species serve a similar role. Gorges can build chambers, and start new hives (in NS game mode only). Hives are large, hanging organisms that respawn dead aliens and heal any aliens standing nearby. Each map has three potential hive locations. With every new active hive, all Kharaa species become more powerful, and gain access to new evolutionary abilities (see: "Kharaa Evolutions").
Hives are also the single most expensive thing to build -- so someone better save up their resource points to get one going, or the Kharaa will be outpaced by marine technology � and doom and destruction will soon follow.
See "Marine Upgrades", above, to learn how marines resupply in Combat game mode.
Frontiersmen can get health and ammo two ways -- from an armory (see Marine Structures), or from health or ammo packs.
The armory replenishes the ammo and health of anyone "using" it ("use" key's default setting: "e").
Health and ammo packs can be dropped by the commander anywhere, anytime. A skilled commander can keep his soldiers alive and fighting in the fiercest of battles.
| Ammo and Health Items | |
|---|---|
 |
HEALTH PACK :: Adds up to Cost: |
 |
AMMO PACK :: Adds one clip worth of ammunition to the marine's inventory. Automatically transforms itself into the appropriate ammunition type for the currently selected weapon. Only picked up if the marine can hold more and the weapon requires ammunition for use. Cost: |
 |
CATALYST PACK :: Boosts the metabolism of a marine. The marine gains a Cost: Duration: |
Since the Kharaa's weapons are biological, they don't have to worry about ammo. They do have to watch their energy bar, however (see "HUD") -- when it's depleted they are too tired to attack (though they can still run). Standing still replenishes energy. The adrenaline evolution, or standing next to a movement chamber increases how quickly energy replenishes.
Kharaa are healed by standing next to a hive, or if a gorge gives them a hit of healing spray. Also, the defensive evolution regeneration allows an alien to heal itself. Finally, the fade's metabolize ability can heal its wounds. Healing restores health first, then armor.
Since the Kharaa's weapons are biological, they don't have to worry about ammo. They do have to watch their energy bar, however (see "HUD") -- when it's depleted they are too tired to attack (though they can still run). Standing still replenishes energy. The adrenaline evolution, or standing next to a movement chamber increases how quickly energy replenishes.
Kharaa are healed by standing next to a hive or defense chamber, or if a gorge gives them a hit of healing spray. Also, the defensive evolution regeneration allows an alien to heal itself. Finally, the fade's metabolize ability can heal its wounds. Healing restores health first, then armor.
Marines begin play with an LMG (Light Machine Gun), pistol, and knife; and standard armor.
You have four weapon slots:
Slot 1: Your primary weapon. You can only have one Slot 1 weapon at a time.
Slots 2 & 3: Your trusty pistol and knife. Don't underestimate their usefulness.
Slot 4: You can potentially have all three Slot 4 weapons at the same time.
The following list describes the weapons and equipment available to marines. See the "Marine Pop-Up Menu (CO)" and "Experience (CO)" sections for more information on acquiring experience points and spending levels in Combat mode. All weapons, armor, and equipment are permanent when purchased. They are not lost when dying and respawning. Note that the "Cost" and "Requires" fields do not apply to Combat mode.
Your commander can equip you with new weapons and gear by researching the appropriate tech (which costs resource points) and then dropping a new weapon for you (which also costs). See the "Tech Tree" section for more info on researching. When you are killed, any weapons you've been given are dropped -- and if a marine doesn't pick them up, they vanish. In NS game mode, all equipment and armor is lost when respawning.
Here's a list of the marine weapons and gear:
| Marine Weapons -- Slot 1 | |||||||
|---|---|---|---|---|---|---|---|
 |
LIGHT MACHINE GUN :: Default weapon. Fair damage and range. Versatile and effective, more so in groups. Marines spawn with
|
||||||
 |
SHOTGUN :: Deadly at close range. Fires
|
||||||
 |
HEAVY MACHINE GUN :: Not as accurate as the Machine Gun, but twice the punch and a bigger clip.
|
||||||
 |
GRENADE LAUNCHER :: Used for groups of enemies or structures. Grenades explode on contact with an enemy or after
|
||||||
| Marine Weapons -- Slot 2 | |||||||
 |
PISTOL :: Default secondary weapon. Good accuracy and power, small clip. Marines spawn with
|
||||||
| Marine Weapons -- Slot 3 | |||||||
 |
KNIFE :: Last ditch weapon when marines run out of ammo or want to conserve it.
|
||||||
| Marine Weapons -- Slot 4 | |||||||
 |
|
||||||
 |
HAND GRENADE :: You only get one grenade, so make it count. They take
|
||||||
 |
MINES :: Mines affix to any surface, and explode on contact with an enemy or after absorbing
|
||||||
| Marine Armor and Equipment | |||||||
 |
HEAVY ARMOR :: Raises the armor of a marine to Cost: |
||||||
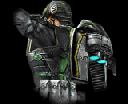 |
JETPACK :: Allows sustained flight, until the energy meter hits zero. Must land to recharge. Handy for avoiding fangs and claws. Can't be worn with Heavy Armor. Cost: |
||||||
An "upgrade" is the catch-all name for anything marines can purchase with levels they gain through experience. See the "Experience (CO)" section to learn more. The "Marine Upgrade Path" (above) describes the order in which upgrades can be purchased.
Note on "Auto-Commander": these upgrades are unique to Combat game mode, and act like an automated version of the NS game mode commander.
| COMBAT MODE MARINE UPGRADES | |
|---|---|
| DAMAGE UPGRADES :: Three levels of upgrade that provide |
|
| ARMOR UPGRADES :: Three levels of upgrade that give a |
|
| MOTION TRACKING :: This upgrade reveals all enemy movement, anywhere on the battlefield, as "blips" automatically displayed on your HUD. | |
| WEAPONS AND EQUIPMENT :: In Combat mode, new weapons and gear are purchased as upgrades, and become permanent additions to your arsenal. See "Marine Weapons and Equipment," above, for descriptions and details. All items in the "List of Weapons and Equipment" are available. The "Experience (CO)" section explains the order in which these upgrades can be purchased. | |
| AUTO-COMMANDER UPGRADES | |
| RESUPPLY :: When you have less than |
|
| SCANNER SWEEP :: If there is a cloaked enemy nearby, there's a chance that the Auto-Commander will scan the area around you, forcing any hidden players to uncloak. | |
| CATALYST PACKS :: If, after making a kill, the Auto-Commander decides you are a competent fighter, it may drop a catalyst pack on you as a reward -- temporarily increasing your speed and rate-of-fire (see "Ammo and Health", above). | |
In NS game mode, the commander can research the following upgrades that automatically affect all marines, or that allow for new structures and weapons (see also "Tech Tree").
| ARMS LAB UPGRADES | |||||
|---|---|---|---|---|---|
| DAMAGE UPGRADES :: Three levels of upgrade that provide Cost: Research time: |
|||||
| ARMOR UPGRADES :: Three levels of upgrade that give a Cost: Research time: |
|||||
| CATALYST PACKS :: This technology allows the commander to drop catalyst packs anywhere on the map. These packs boost movement speed and weapon rate-of-fire by Cost: Research time: |
|||||
| TECH LAB UPGRADES | |||||
| JETPACK TECH :: Once researched, this technology allows jetpacks to be constructed within Cost: Research time: |
|||||
| HEAVY TECH :: This technology is required before heavy armor can be purchased. Once complete, heavy armor can be constructed within Cost: Research time: |
|||||
| OBSERVATORY UPGRADES | |||||
| MOTION TRACKING :: This upgrade reveals all enemy movement, anywhere on the battlefield, as "blips" automatically displayed on the marine HUD. The Kharaa can counter this effect by standing still, or staying close to sensory chambers. Cost: Research time: |
|||||
| DISTRESS BEACON :: The distress beacon is the commander's last ditch SOS call for reinforcements. All marines, including those waiting to respawn, appear in the marine start -- even if there are no infantry portals left. Cost: Time to activate: |
|||||
| PHASE TECH :: Phase tech is a specialized nanite technology needed for the construction of phase gates (see "Marine Structures"). Cost: Research time: |
|||||
| ARMORY UPGRADES | |||||
| ADVANCED ARMORY :: The armory must be upgraded to an advanced armory before heavy weapons can be purchased. When complete, heavy machine guns and grenade launchers can be dropped within Cost: Research time: |
|||||
| HAND GRENADES :: After the commander has researched this technology, each marine respawns with a single grenade in weapon slot 4. Useful for countering lerks and destroying enemy buildings. Cost: Research time: |
|||||
| TURRET FACTORY UPGRADES | |||||
| SIEGE UPGRADE :: Turret factories must be be upgraded, before siege cannons can be built. Once this upgrade completes, siege cannons can be built within Cost: Research time: |
|||||
ELECTRICAL DEFENSE :: An electric field that protects turret factories and resource nodes by shocking up to
|
|||||
Researching new weapons and upgrades requires the building of structures. Structures also serve other functions -- see below. Structures are unique to the NS game mode, with the exception of the command console.
Your commander will place structures, but until you and your teammates build them, they won't do anything. To build, get within touching distance of the structure and hold down your "use" key ("e" default setting). You'll see a status bar around the structure, filling in as it is built (note: multiple marines can speed construction). When built, the structure will deploy -- usually with a particular sound and movement.
| Basic Marine Structures | |||||||
|---|---|---|---|---|---|---|---|
 |
COMMAND CONSOLE :: Allows one marine to connect to the command network and take the role of commander. The marine team always starts with a single command console. Cost: Build time: Health: |
||||||
 |
RESOURCE TOWER :: Allows the commander to tap a ship or base's raw nano-supplies. Can only be constructed over resource nodes. Each tower adds Cost: Build time: Health: |
||||||
 |
INFANTRY PORTAL :: Allows marines to respawn after being killed. Infantry portals are the most crucial structure to defend, second only to the command console. Must be placed within Cost: Build time: Health: |
||||||
 |
ARMORY :: Dispenses "free" ammo for a marine's active weapon, and allows weapon construction within Cost: Build time: Health: |
||||||
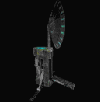 |
OBSERVATORY :: Reveals nearby enemies (even when cloaked), allows scanner sweeps, distress beacons, and research of motion tracking. Scanner sweeps allow the commander to see cloaked aliens and structures in a Cost: Build time: Health: |
||||||
 |
PHASE GATE :: Allows marines to teleport instantly between any two gates. For more than two gates, the destination is randomly determined. To use a phase gate, stand next to it and press your "use" key ("e" default setting). Cost: Build time: Health: |
||||||
| RESEARCH STRUCTURES | |||||||
 | ARMS LAB :: Taps local resources to allow three levels of weapons and armor upgrades. Cost: Build time: Health: |
||||||
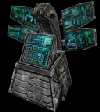 | PROTOTYPE LAB :: Allows the research of advanced, cutting edge technology -- namely jetpacks and heavy armor. Cost: Build time: Health: |
||||||
| DEFENSIVE STRUCTURES | |||||||
 | TURRET FACTORY :: Allows sentry turrets (automated gun emplacements) to be built for base and perimeter defense. Turrets must be placed within Cost: Build time: Health: |
||||||
 | SENTRY TURRET :: Automatically acquires the nearest enemy target (players or chambers) and fires. If its turret factory is destroyed, it ceases to function.
|
||||||
 | AUTOMATED SIEGE CANNON :: Automatically acquires the nearest enemy structure (not player) it can "see" and focuses a devastating blast at its location. The siege cannon can fire through walls or obstacles at a range of up to
|
||||||
Marines begin play with an LMG (light machine gun), pistol, and knife; and standard armor. In NS mode, their commander can spend resources to unlock more powerful weapons and abilities, and build strategic structures. But limited resources force tough choices -- the commander must set priorities, and pick a path through the tech tree. For descriptions of structures, weapons, equipment and upgrades see above.
The Kharaa match human weapons and upgrades with 5 powerful alien species, and amazing evolutionary abilities.
There are five species of Kharaa -- and each has distinct abilities, strengths and limitations. In NS game mode you can change to any species you can afford, as often as you like. In Combat mode you must evolve according to the Alien Upgrade Path (see "Alien Upgrades (CO)" above).
While changing to a new lifeform you are encased in a gestation sac, and are totally defenseless for a number of seconds (see the "Gestation Egg" under "Alien Species". Higher lifeforms require a longer gestation. If you're found while gestating, you are an easy target, so find a place to hide or be sure you have friendly aliens to protect you. Your resources (NS) or level (CO) are spent as soon as you start gestating, so if you're killed before you complete, your investment is lost. The following table shows gestation times in seconds:
| Gestation Times | ||
|---|---|---|
| TARGET SPECIES | NS MODE TIME | COMBAT MODE TIME |
| Skulk | ||
| Gorge | ||
| Lerk | ||
| Fade | ||
| Onos | ||
When you change species, you keep the same percentage of health and armor (so if you're at half health before, you'll at half health after, etc.).
Hive abilities include alien attacks (like the skulk's bite), and other combat affects (like the fade's blink, or the lerk's primal scream). There are four levels of alien abilities: Hive 0, Hive 1, Hive 2, and Hive 3.
In Combat mode, you always have access to Hive 0 and Hive 1 abilities. You can spend levels to unlock access to Hive 2 and Hive 3 abilities (see the "Experience (CO)" section).
In NS game mode, Hive 0 abilities are always available. To access Hive 1, Hive 2, and Hive 3 abilities, your team needs to have that number of hives active. For example: Xenocide is the skulk's Hive 3 ability. Until the aliens get all three hives up, skulks won't be able to use it. Note: aliens start play with one hive, but they can lose it, and have zero. In those cases, they lose all but their Hive 0 abilities, and start taking damage. If they can't get one built fast, the game is over.
Each species and their abilities, are described below.
| Kharaa Species | |||||||||||||||||||||||||||||
|---|---|---|---|---|---|---|---|---|---|---|---|---|---|---|---|---|---|---|---|---|---|---|---|---|---|---|---|---|---|
 | SKULK :: All players (re)spawn as skulks. Capable of blurring speed and leaps of near limitless height, skulks are equally adept at combat and scouting. They can run up walls and ceilings, and often ambush marines from unexpected directions. Special Ability: Wall Running: Just look and run, and you can automatically climb any flat surface.
|
||||||||||||||||||||||||||||
|
|||||||||||||||||||||||||||||
 | GORGE :: Belligerent and obese, gorges serve mainly a support role -- though they can dish out damage when they must. In NS game mode gorges are the only species that can build. Special Ability: Build: (NS) Gorges can build chambers (including resource towers), and trigger the growth of new hives. Use the pop-up menu to choose what to build. Standing next to a chamber and holding down the "use" key (default "e") speeds building.
|
||||||||||||||||||||||||||||
|
|||||||||||||||||||||||||||||
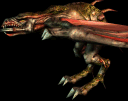 | LERK :: Wiry, fast, and fierce, lerks attack on the wing -- harassing marine squads and supporting other Kharaa. Low armor and health means they usually keep their distance. Their vicious bite makes it a good idea for marines to, as well. Special Ability: Flight: Tap your jump key to fly. Hold down to glide. Watch your energy bar!
|
||||||||||||||||||||||||||||
|
|||||||||||||||||||||||||||||
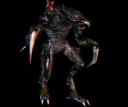 | FADE :: The shocktroopers of the Kharaa, fades can take and give heavy damage, up close and at a distance. Their blink ability can be downright spooky.
|
||||||||||||||||||||||||||||
|
|||||||||||||||||||||||||||||
 | ONOS :: The dreadnoughts of the Kharaa, the onos are tanks -- highly armored and very powerful. Only the best-equipped marine squads can hope to defeat them. If the onos doesn't swallow them whole first.
|
||||||||||||||||||||||||||||
|
|||||||||||||||||||||||||||||
 | GESTATION EGG :: When gestating to a new species or gaining a new evolution, the Kharaa surround themselves with an organic "egg" sack. Eggs have little health/armor, so choose carefully where you gestate. See "Changing Species" above, or "Alien Evolutions" below. |
||||||||||||||||||||||||||||
Chambers are alien growths that gorges build for offense, defense, and tactical purposes. With the exception of the hive, they are unique to the NS game mode.
In NS mode, every active hive allows one kind of chamber to be built (with the exception of offensive chambers and resource chambers, which can always be built). Chambers are required to evolve (see section below). Only gorges can build them.
| BASIC CHAMBERS | |||||||
|---|---|---|---|---|---|---|---|
 | HIVE :: The hive is the most important alien growth. It is a large organism, that hangs from the ceiling in special map locations. The Kharaa need a hive to spawn (see "Respawning," above). Any alien standing within
| ||||||
 | RESOURCE TOWER :: Draws resources from resource nodes at rate of
| ||||||
 | OFFENSE CHAMBER :: Attacks nearest enemy in line-of-sight with deadly spikes.
| ||||||
| EVOLUTIONARY CHAMBERS | |||||||
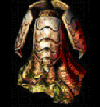 | DEFENSE CHAMBER :: Automatically heals up to
| ||||||
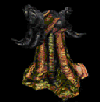 | MOVEMENT CHAMBER :: Allows instant movement to nearest hive, or hive under attack. Also regenerates the energy of up to
| ||||||
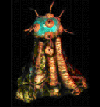 | SENSORY CHAMBER :: Any marine in line-of-sight of chamber is revealed on hive sight. Blocks the marine motion tracking technology. Cloaks aliens and chambers that have been within
| ||||||
Evolutions are advanced adaptive abilities that, when combined with different species, encourage a wide variety of play-styles. There are three categories of evolution: Defensive, Movement, and Sensory. Evolving a new ability requires gestation time -- during which you can see around you, but are helpless. Evolutions are purchased through your pop-up menu.
In Combat mode, you can spend a level to purchase any of the nine evolutions. A highly ranked alien could potentially evolve them all. See the "Experience (CO)" and "Levels (CO)" sections for more on spending levels.
Evolutions are all gained at maximum power. They persist when you change species, or even when you die and respawn.
In NS game mode, aliens must build chambers to get evolutions (see "Chambers," above). Each hive allows for one kind of chamber (Defense, Movement, or Sensory). Once a chamber is built, the corresponding evolutions become available to all players. Players can choose one evolution from each category. The number of chambers built determines the level of the evolutions -- up to a max of three. Evolutions cost
Example of evolutions and chambers (NS): at the start of the game, the Kharaa decide to go with Movement as their first type of evolution. A gorge builds a movement chamber, and the movement icon flashes on each player's screen. For
| DEFENSIVE EVOLUTIONS | ||||||
|---|---|---|---|---|---|---|
CARAPACE :: A damage-soaking lattice of cartilage grows into the skin.
|
||||||
| REDEMPTION :: For every second spent near death (below |
||||||
| REGENERATION :: Damage slowly heals, giving back |
||||||
| MOVEMENT EVOLUTIONS | ||||||
| ADRENALINE :: Energy recharges |
||||||
| CELERITY :: Each level increases movement speed, though some lifeforms gain more of an advantage then others. Also affects in-air (flight) speed. Increases the alien's movement speed by |
||||||
| SILENCE :: Movement and attacks are quieter -- the volume drops to |
||||||
| SENSORY EVOLUTIONS | ||||||
| CLOAKING :: When standing still and not attacking, the alien fades to near invisibility. The time required drops with each level: |
||||||
| FOCUS :: Each level slows rate of fire by |
||||||
| SCENT OF FEAR :: Nearby enemies show up on hive sight (range increases with level: |
||||||
Hold your [TAB] key (default) to bring up the scoreboard.
The Combat mode scoreboard reflects ranking. See the "Experience (CO)" section.
In NS mode, players are scored based on their contributions to the team. Players get points for advancing their team's cause: including building structures, destroying enemy structures, and killing enemy players.
| THE NATURAL SELECTION SCORING SYSTEM | |||
|---|---|---|---|
| MARINE ACTION | REWARD | ALIEN ACTION | REWARD |
| Killing Skulk | Killing Marine | ||
| Killing Gorge | Killing Jetpack Marine | ||
| Killing Lerk | Killing Heavy Armor Marine | ||
| Killing Fade | Killing Sentry Turret | ||
| Killing Onos | Killing Automated Siege Cannon | ||
| Building Command Chair | Building Hive | ||
| Building Resource Tower | Building Resource Chamber | ||
| Building Other Marine Structure | Building Other Alien Structure | ||
Rules for Structures:
Killing a structure is worth the same amount of points as building it.
Points are given to the gorge that placed the structure, regardless of who helped.
The commander gets all points for building, not marines (keeps them at the top of the scoreboard).
Icons reflect a player's special status in the Natural Selection community, and on a server. To toggle any scoreboard icons that apply to you on and off, type "auth" in the game options screen. Icons appear before your name on the scoreboard. Here are a list of icons, and what they represent:
If a control performs some other function (than is obvious from its name) it is specified in the "Notes" column. (Example: the "jump" key has a different function in spectator mode.)
| Function | Default key mapping |
Notes |
| Fire | Mouse button one | Marine: Fire weapon. Alien: Use current alien ability. Spectator: cycles to next spectator target. Other: There is no alternate fire. |
| Pop-up menu | Mouse button two | Marine/Alien: Hold or click button to open menu. Select item to purchase, or action to be performed and let go of button or click again. (See section, above, for more info.) |
| Move forward | W | |
| Move backward | S | |
| Move left (strafe) | A | |
| Move right (strafe) | D | |
| Jump | Space | Marine/Alien: Jump. Spectator: Cycles through spectator modes. |
| Game menu | ESC | Opens out of game menu. Under Steam, this also allows you to go to the Ready Room, and to access your Friends list. |
| Reload weapon | R | Marine only. |
| Drop weapon | G | NS game mode only. Marine only. |
| Use | E | Marine/Alien: Open doors, flip switches, etc. This is also how marines or gorges build structures. |
| Walk | SHIFT | Move slower, but silently. |
| Duck | CONTROL | Marine/Alien: Duck. Alien: Disables skulk wall-walking. |
| Flashlight | F | Marine: toggles your flashlight on and off. Alien: toggles your alternate vision mode on and off (makes your teammates and team structures glow). |
| Spray logo | T | Spraypaints your logo (set in Customize Menu). |
| Menu Item 1 | 1 | Marine: selects primary weapon (machine gun, shotgun, heavy machine gun, or grenade launcher). Alien: selects universal (hive-0) ability. |
| Menu Item 2 | 2 | Marine: selects secondary weapon (pistol). Alien: selects hive-1 ability. |
| Menu Item 3 | 3 | Marine: selects knife. Alien: selects hive-2 ability. |
| Menu Item 4 | 4 | Marine: selects tertiary ability (mines, welder, hand grenade). Alien: selects hive-3 ability. |
| Next weapon/ability | MOUSE WHEEL DOWN | |
| Previous weapon/ability | MOUSE WHEEL UP | |
| Display scores | TAB | Shows scores, teams, kills, game time, map name, etc. See "Scoreboard" section. |
| Chat message | Y | Chat message to all. Shows teammates the name of the location you're in. |
| Team chat message | U | Chat message to team. Shows teammates the name of the location you're in. |
| Take screen shot | F5 | |
| Voice | ALT | Hold this key and talk into your microphone to talk to your teammates. |
| Hotgroups (Menu Items 1-5, Commander only) | 1-5 | 1-5 See Hotgroups section in Commander Interface (below). |
| Request order | Z | Marine: ask Commander for an order. |
| Acknowledged | X | Marine: indicates to Commander you are carrying out order. |
| Need Medpack | *NONE* | Marine: request a medpack from Commander. |
| Need Ammo | *NONE* | Marine: request an ammo pack from Commander. |
These controls are unique to the commander. They are mapped to the corresponding marine controls (see above) - so whichever key you have assigned to "Jump" becomes your "Go-To-Last-Alert" key when you become commander. Also note that controls from the above list not specified as "Marine," "Alien," "Spectator," or "Other" function the same when you are commander (i.e.: Team Chat is still the "U" key).
| Function | Default key mapping |
Notes |
| Fire | Mouse button one | Select. |
| Move forward | W | Scroll view up. |
| Move backward | S | Scroll view down. |
| Move left (strafe) | A | Scroll view left. |
| Move right (strafe) | D | Scroll view right. |
| Jump | Space | Go to the last alert played. |
| Duck | CONTROL | Your voice will only be heard by selected marines. |
| Hotgroups (Menu Items 1-5, Commander only) | 1-5 | See "Hotgroups and Squads" section below. |
Eject Commander (NS): choosing this option begins a vote among all marines that, if successful, ejects a commander from the command console. They are barred them from further use for the duration of their stay on that server. Intended for use only when a commander is abusing their power.
Gestating: Aliens can evolve to a new lifeform by spending their resources (NS) or levels (CO), and choosing a new lifeform off the pop-up menu. In NS game mode the cost of evolving to a lifeform is displayed on the menu. In Combat mode, the menu will show the next species available. See the "Alien Species" section for more info.
As in traditional Real-Time Strategy games, the commander can create "hotgroups". Hotgroups allow the commander to quickly and easily access players or structures. They also allow the Commander to see when hotgrouped players or structures are under attack. Marines in a hotgroup are referred to as a "Squad." Grouped players know which squad they are in, and often have increased morale.
To create a Hotgroup or Squad, select the marines or structure, then hold duck (default [CONTROL]) and press a Menu Item Key (1-5 by default). Any players in this squad are immediately informed they are part of this squad, and an icon representing the hotgroup will be displayed at the top of the Commander HUD. This icon will blink red when the group is under attack.
To select a hotgroup, left-click their icon or press the hotgroup key (1-5 by default). To jump to the group's location, click again or press the key again and your view will center on them. Pressing it one last time will return you to your previous position in case you made a mistake.
| Function name | Console var | Notes |
| Auto help | cl_autohelp (0/1) | Disable to turn off hints to help new players. |
| Center player names | cl_centerplayerid (0/1) | When looking at a player, you see their name and if they're friendly, their health and armor percentage. Normally this is displayed in the lower left of the screen, but when this is enabled, it shows in the center of your screen. |
| High-detail particles | cl_highdetail (0/1) | Disable on slow computers or video cards, to skip non-essential particle systems. |
| Music enabled | cl_musicenabled (0/1) | Turn off game and custom music. Takes affect once current song is done. |
| Music volume | cl_musicvolume (0-255) | Adjust volume of music by setting to a value between 0 and 255 (eg, 0 is silent, 128 is half volume and 255 is full volume). |
| Force default FOV | cl_forcedefaultfov (0/1) | Some alien lifeforms change the field of view, for atmospheric effect. Set this to 1 to force a default 90 degree field of view at all times. Turn on if you get motion-sick easily. |
| Show build messages | cl_buildmessages (0/1) | Setting to 0 turns off build icons, which tell you what structures your Commander or gorges are building. These icons normally appear in the upper left portion of the screen and disabling them means you'll never see them. |
| Dynamic lights | cl_dynamiclights (0/1) | Certain older video cards suffer noticeable performance problems with dynamic lights. If your frame-rate suffers whenever the Commander drops something, near phase gates or near welding, try turning this off. Epileptic players or players that are prone to seizures will want to disable this as well. |
| Commander hotkeys | cl_cmhotkeys | Sets default Commander hotkeys. These hotkeys are the 4x3 button grid that corresponds with the grid of buttons in the lower-right of the Commander interface. Pressing the hotkey is identical to clicking that button in the grid. To change these keys, enter the keys to use starting at the top left of the grid, reading left to right and top to bottom. For instance, to shift the default keys one key to the right, you would enter "wertsdfgxcvb". |
| Decal limit | r_decals (0-496) | Indicates how many decals (bullet holes, blood splatters, etc.) can be drawn at once. Increase this value to see the signs of battle long after it happens, decrease to improve your frame-rate. |
| Weapon fast-switch | hud_fastswitch (0/1) | When enabled, weapon icons aren't drawn, and weapons are switched to instantly. This is faster for experienced players who always know exactly what weapons or abilities they have available. |
| Music directory | cl_musicdirectory | To shuffle your own custom music while playing NS, type in the drive and directory of your music folder here. Any .mp3s in that directory are chosen randomly when choosing a new song to play as background music. Examples: "c:\music" "d:\Music files". |
| Music delay | cl_musicdelay (0-1000) | Maximum time to wait before playing next song, in seconds. After a song plays, NS waits a random time between 0 and this value before choosing the next song to play. Changing to 0 means you'll always have music playing, increasing the value will mean more silence. |
Tournament mode - mp_tournamentmode (0/1)
Set to 1 to enable "Tournament mode", set to 0 to enable "Casual mode". Tournament is like Casual mode with a few differences:
Casual mode is strongly recommended for public play, and Tournament mode is recommend for scrims and clan matches.
Friendly fire - mp_friendlyfire (0/1)
Players do 33% damage to friendly players and structures.
Cheats - sv_cheats (0/1)
For testing only. Speeds build and research time, always lets players spawn immediately when joining a team, lets all players hear all other players when using voice communication, and more.
Allows the following cheat codes to be used:
Draw damage - mp_drawdamage (0/1)
When enabled, shows a floating numeric indicator whenever a player or structure takes damage.
Handicapping - mp_team1damagepercent, mp_team2damagepercent (0 to 100)
NS has a handicapping system, so uneven teams can still have fun together. It's primarily used in a competitive (tournament mode) setting. This system was designed to not affect build orders adversely, so strategies used with handicapping are still useful, and so handicapping is a viable and efficient way to practice.
Set a team's handicap level to less then 100% to give them a disadvantage, in order to have even teams. This value lessens damage done to enemy players and structures. For instance, if Team 1 is better then Team 2, and they want to a fun even scrim, mp_team1handicap could be set to 80, which means that Team 1 will only do 80% damage. When either team has a handicap not equal to 100, the HUD will display the current handicap values are (in order to prevent abuse).
Time limit - mp_timelimit (-1 - any value)
Setting the timelimit sets the number of minutes after which, the map will automatically switch to the next map in the map cycle. The map will NEVER change in the middle of the game, only after a game has ended and players have returned to the ready room. Set to -1 to disable automatic map rotation.
sv_restart or sv_restartround (server only)
Restarts the game immediately, keeping everyone on the same teams.
endgame (server op or with cheats enabled only)
Usage: endgame 1 or endgame 2. The game ends, with victory by the team specified.